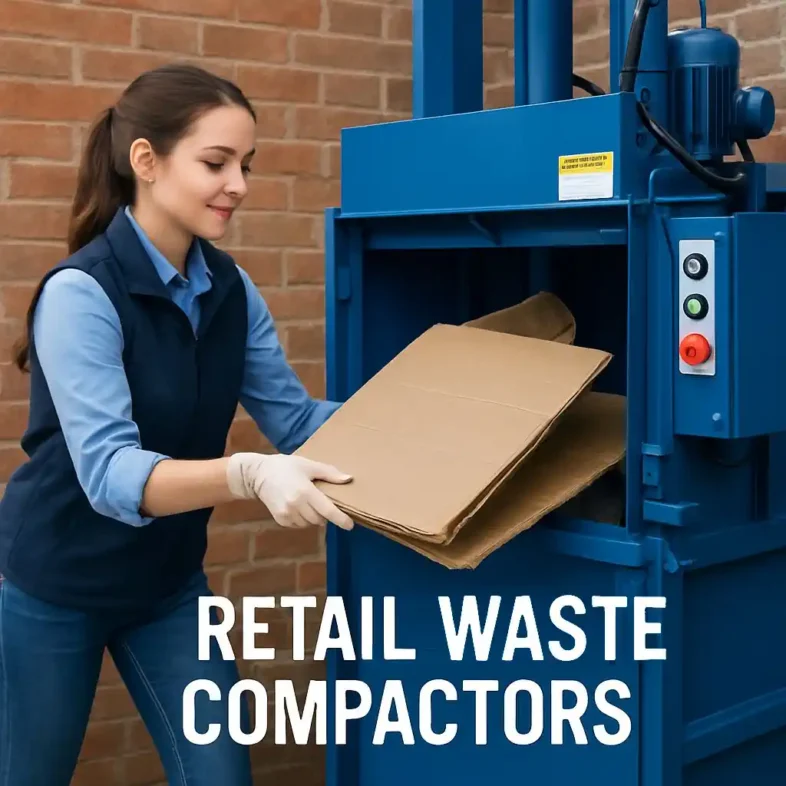
Retail waste compactors are powerful tools for shops, supermarkets, and distribution centres—compressing bulky trash like cardboard, packaging, and general refuse to cut volume, reclaim space, and lower collection and disposal costs. These are also called commercial waste compactors, and options range from portable units for flexible needs to static systems for high-volume locations; most use a hydraulic ram to compact waste into containers.
Article-At-A-Glance – Retail Waste Commercial Compactor Guide
- Compactors can cut hauling and disposal costs dramatically—often reducing pickup frequency by 40–75%
- Pick the right type for your waste: vertical balers for cardboard, self-contained units for wet/food waste, horizontal models for very high volume
- Proper compaction frees retail space and improves store cleanliness and customer experience
- Smart compactors with remote monitoring reduce unnecessary pickups and help track waste volumes across sites
- Example vendors provide turnkey solutions tailored for retail operations
Drowning in retail waste? You’re not alone. Many stores face heavy packaging and food waste streams that drive up hauling fees and create operational headaches. A focused compaction strategy can turn that problem into measurable savings and cleaner, safer facilities.
This retail waste compactor guide also doubles as a practical commercial waste compactor guide for multi-site businesses—helping you choose the right unit, estimate costs, and plan installation. Want ready-to-use checklists, ROI examples, and supplier comparisons? Buy the full ebook, “Retail Waste Compactors: Ultimate Guide & Tips,” for downloadable tools and case studies that make implementation straightforward.
Read on for a concise, actionable overview of selecting, installing, and maintaining the right compactor for your retail business.

Why Retail Waste Compactors Are Game-Changers for Your Business
“After installing our first compactor, we cut pickups from three times a week to once, lowering monthly hauling costs by 68% — the system paid for itself in under nine months.” – Regional Manager, National Clothing Retailer
Standard dumpsters struggle with the mix of packaging, cardboard, and occasional food waste that retail stores produce. Loose bins mean more pickups, more labor breaking down boxes, and wasted space that could be serving customers.
A commercial trash compactor is a practical upgrade in your waste management toolkit. By reducing waste volume (many units achieve effective compaction ratios like 6:1 under ideal conditions), compactors shrink storage needs and cut pickup frequency — directly trimming disposal costs and associated labor.
The financial upside is real: many retailers report 40–75% reductions in hauling costs after installing compactors. Add reclaimed space, fewer pest issues, and better site cleanliness, and compactors often pay back their cost in a year or two. Want to see a quick ROI example? Download the PDF preview or use the ROI calculator included in our ebook.
Types of Retail Waste Compactors to Consider
Choosing the right compactor starts with matching machine types to your specific waste stream. Not all retail waste is the same—some stores generate lots of cardboard and dry recyclables, others produce food and wet waste—so pick the equipment that fits your materials, space, and service needs.
Vertical Balers: Space-Saving Solutions for Cardboard
“Get Vertical Balers – New or Used – in …” from carrindustrial.com and used with no modifications.
Vertical balers compress cardboard and other dry recyclables into dense, stackable bales. They’re ideal for retail stores with limited floor space but steady cardboard output. Many retailers can sell or recycle bales, offsetting disposal costs.
- When to choose: heavy cardboard, limited floor footprint, focus on recycling.
- Typical sizes/capacity: small 30–55″ chamber balers to large 100″+ models (choose by bale weight and storage capability).
Decision tip: If most of your waste is dry and recyclable, a vertical baler is often the easiest route to immediate recycling revenue and space savings.
Horizontal Compactors: High-Volume Waste Processing
“LARGE COMPACTORS – Compactors Inc” from compactorsinc.com and used with no modifications.
Horizontal compactors handle continuous, mixed waste streams for big-box and high-volume retail sites. They feed waste horizontally into large containers and are designed for heavy throughput and fewer service calls.
- When to choose: large waste volumes, mixed dry waste, need for continuous feeding.
- Typical sizes/capacity: container volumes from 2 to 30+ cubic yards; pick by weekly waste volume and truck access.
Decision tip: If your waste volume is high and you want to minimize pickup frequency, horizontal compactors usually offer the best efficiency.

Self-Contained Compactors: Preventing Leaks and Odors
“2 Yard Self Contained Compactor …” from nedland.com and used with no modifications.
Self-contained compactors combine the compaction chamber and container in a sealed unit—excellent for grocery stores, food courts, and other businesses producing wet waste. Their sealed design controls odors and liquids, reducing pest pressure and sanitary complaints.
- When to choose: significant food or wet waste, odor and leakage concerns.
- Typical sizes/capacity: small 2–4 yard units up to larger 8–12 yard self-contained models depending on throughput.
Decision tip: For stores with food waste, a self-contained compactor often prevents contamination and simplifies cleanup compared to open dumpsters.
Stationary Compactors: Permanent Installation Options
“Stationary Compactors – Sebright …” from www.sebrightproducts.com and used with no modifications.
Stationary compactors are fixed units that push waste into removable containers for haulers to swap. They balance capacity and cost, and are common at loading docks or dedicated waste areas in retail facilities.
- When to choose: consistent general waste, desire for a permanent, high-capacity solution.
- Typical sizes/capacity: containers typically 4–30 cubic yards; choose based on collection frequency and space.
Decision tip: Stationary systems are a solid first step for many retailers because they scale well and handle seasonal spikes.
Quick example: A mid-size store that swapped multiple dumpsters for a stationary compactor and vertical baler cut pickup frequency in half and reclaimed significant back-of-house space—see full case studies and capacity worksheets in the ebook.
7 Key Benefits of Installing a Waste Compactor
Upgrading your waste management delivers measurable savings and smoother operations. Below are the seven top benefits retailers see after installing compactors—with one-line explanations and quick data points for clarity.
1. Cut waste hauling costs
Benefit: Compacting reduces pickup frequency and hauling fees. Quick fact: Many retailers report 40–75% lower hauling costs after installation (results vary by site and service rates).
2. Reduce labor hours spent on trash management
Benefit: Less time breaking down boxes and moving bins frees staff for customer-facing work. Quick fact: Retailers commonly reclaim 10–20 lost labor hours per week after switching to compaction systems.
3. Improve store cleanliness and customer experience
Benefit: Compactors contain waste, cut wind-blown litter, and tidy loading areas—improving first impressions and brand perception.
4. Prevent pest problems and health hazards
Benefit: Sealed units and reduced exposure to loose waste lower attraction for rodents and insects, helping meet health and safety expectations.
5. Support sustainability goals and reduce carbon footprint
Benefit: Fewer pickups mean fewer truck miles. Quick fact: Compaction helps reduce transport-related emissions and improves recycling separation for higher diversion rates.
6. Free up valuable retail space
Benefit: Compactors significantly reduce required storage footprint. Quick fact: Typical space savings range from 60–80%, letting you reclaim back-of-house area for revenue-generating uses.
7. Improve employee safety around waste handling
Benefit: Controlled compaction reduces manual lifting and exposure to sharp objects—cutting injury risk and related claims.
Source image: weeklysafety.com
Quick comparison — Dumpster vs. Compactor: typical outcome
- Pickup frequency: Dumpster = 3–5x/week; Compactor = 1–2x/month
- Hauling costs: Dumpster = higher per-volume fees; Compactor = 40–75% lower hauling costs
- Labor: Dumpster = more hands-on time; Compactor = 10–20 hours/week saved
Want to see exact numbers for your store? Our ebook includes an ROI calculator and supplier cost comparisons so you can model payback under your local disposal rates. Buy the full ebook, “Retail Waste Compactors: Ultimate Guide & Tips,” to get the worksheets and real-world examples that make budgeting this upgrade straightforward.
How to Choose the Right Compactor for Your Retail Operation
Selecting the right compaction system starts with your store’s specific waste stream, space constraints, and business goals. This quick guide helps you match needs to equipment so you pick the right compactor for long-term savings and efficiency.
Assess Your Daily Waste Volume and Type
Run a two-week waste audit: note daily volumes and percentages for cardboard, plastic, food/wet waste, and general refuse. Simple rule-of-thumb:
- If most waste is cardboard/dry recyclables ? consider a vertical baler.
- If you have mixed high-volume waste ? horizontal or stationary compactors usually win.
- If food or wet waste is significant ? choose a self-contained compactor to avoid leaks and odors.
Decision checklist (audit basics): record weight or bin count per day, tag material types, and estimate weekly totals—bring these numbers to vendor quotes. The ebook includes a printable two-week audit template and thresholds (e.g., lbs/day ? recommended size) to speed selection.
Measure Available Space for Installation
Measure footprint and clearance (floor and overhead), plus truck approach and service access. Vertical balers save floor space but need headroom; horizontal units need more floor area but lower ceiling height. Also check local zoning rules for screening or placement restrictions.
- Quick tip: Add 3 feet clearance on all sides for maintenance and a clear truck approach for container removal.
Consider Lease vs. Purchase Options
Leasing lowers upfront cost, often bundles maintenance, and runs typical terms around 36–60 months—handy for businesses planning to move in 3–5 years. Buying usually pays off over the long term and gives you flexibility for customization. Some haulers offer rental-with-service packages for turnkey installation and collection.
Decision tip: If you expect to be in place long-term, model purchase vs. lease in the ROI calculator in our ebook to see which is cheaper over your expected ownership horizon.
Key Features That Matter for Retail Settings
Prioritize these features for retail stores:
- Safety interlocks and simple controls (protect staff and reduce training time)
- Remote monitoring (fill-level alerts and maintenance notifications)
- Odor-control and seamless surfaces for food retailers
- Weather resistance for outdoor units
Putting it together: use your audit numbers to select size and capacity, confirm available space, then decide lease vs. buy. For an easy decision flow, download the checklist and “Which Compactor Fits Me?” quick chart in the ebook — it maps common retail needs to recommended types and sizes.
Cost Breakdown: What to Expect When Investing in a Compactor
Budgeting for a compactor means looking past the sticker price. Total costs include purchase or lease, installation, ongoing maintenance, and collection/disposal impacts — all of which affect your payback timeline.
Initial Purchase and Installation Expenses
New commercial waste compactors generally range from about $10,000 to $50,000 depending on unit type, capacity, and features. Vertical balers are usually at the lower end; high-capacity horizontal systems with extra controls or odor management sit at the higher end. Expect installation costs (electrical work, concrete pad, site prep) in the $2,000–$5,000 range. Refurbished units can cut equipment costs by 30–50% but buy from reputable dealers and confirm warranties.
Ongoing Maintenance Requirements
Plan on annual maintenance equal to roughly 5–10% of the equipment purchase price for routine servicing (hydraulic checks, electrical inspections, wear parts). Many retailers find a service contract (quarterly visits plus emergency response) more cost-effective than reactive repairs. Also budget for major rebuilds (cylinder or ram work) every 5–7 years and occasional control-system updates as smart features evolve. For guidance on maintaining systems that handle organics, see the linked resources on control system updates.
Calculating Your ROI Timeline
Most retailers see payback within 12–24 months when combining hauling savings, reduced labor, reclaimed space value, and lower pest-control costs. Simple ROI formula: (Total Investment) ÷ (Monthly Savings) = Months to Payback. Example: a $25,000 investment that saves $1,500/month pays back in ~17 months. Your local disposal costs, collection frequency, and capacity needs will alter that timeline — use the ROI calculator in our ebook to model your store's exact numbers and compare lease vs. buy scenarios.
Installation Guide: Preparing Your Retail Location
Good planning prevents delays and extra costs. Start site prep at least 8–12 weeks before your target installation date so permits, power, and access are all lined up (see linked regulatory resources).
Power Requirements and Access Points
Many commercial compactors need 208–230V three-phase power and 30–60 amp service, but exact requirements vary by model—confirm specs with the vendor and a licensed electrician. Position the equipment for easy daily access and safe truck approach; a clear truck approach (commonly ~12 feet) helps with container removal. For outdoor units, consider weather protection (awnings, covers) to protect control panels and extend equipment life.
Staff Training Essentials
Designate 1–2 system champions who get advanced training and can coach others. Create a simple visual operating guide to post near the unit, and require lockout/tagout and jam-clearing procedures. Keep training short, practical, and repeated for new hires so safety interlocks and emergency stops are always used correctly.
Compliance with Local Regulations
Permit needs differ by city but commonly include building permits for electrical work and concrete pads, zoning approval for external placement, and health department signoff for food-related installations. Outdoor installs may require drainage plans to prevent runoff. Start conversations with your building department and waste authority early; many vendors offer permitting help as part of installation packages.
Quick installation checklist (save this):
- Confirm equipment specs and electrical load with vendor
- Secure building and zoning permits
- Prepare concrete pad and ensure truck access
- Arrange weather protection and lighting for facilities
- Train staff and post step-by-step operation guides
Need a site-layout example and electrical spec sheet? Download them in the ebook — they make permitting and installer briefings fast and error-free.
Real Results: Success Stories from Leading Retailers
Real-world rollouts show how the right compaction strategy delivers measurable savings and operational benefits. Below are two short, scannable examples with one clear KPI each.
How Grocery Chains Maximise Compactor Efficiency
A 15-store regional grocery chain installed self-contained compactors to tackle food and wet waste. Result: pickups dropped from five times weekly to once a week, producing a large annual hauling-cost reduction and eliminating persistent odor complaints. KPI: major drop in pickups and a substantial cut in pest-control calls after installation (example figures and methodology in the ebook).
Department Store Space Reclamation Case Study
An urban department store replaced eight dumpsters with a stationary compactor plus a cardboard baler, reclaiming 1,800 sq ft that was converted into a customer pickup area. Result: lower hauling costs and reclaimed space valued at a significant annual amount based on local commercial rates. KPI: reclaimed square footage turned into revenue-generating space (detailed numbers and spreadsheets included in the full guide).
Want the full case studies, supplier comparisons, and ROI spreadsheets? Read the in-depth examples and downloadable worksheets in the ebook to model results for your stores and business.
Maintenance Tips to Extend Your Compactor's Lifespan
Regular maintenance keeps equipment running and prevents costly downtime. A well-kept compactor can reliably serve 10–15 years; neglect shortens life and increases repair bills. Combine simple daily checks by staff with scheduled professional service to protect your investment.
Daily Checks Your Staff Should Perform
Keep the daily checklist short and consistent so floor staff will do it every shift. Key actions (under 5 minutes):
- Check for visible hydraulic fluid leaks and report immediately
- Confirm safety interlocks and emergency stop work correctly
- Listen for unusual noises during a cycle
- Clear charge chamber and surrounding area of loose debris
- Verify control panel shows normal status—note any error codes
Document each check in a simple log so trends show up early. For more tips on reducing on-site waste, see the linked resources.
Monthly Maintenance Schedule
Perform a deeper monthly review to prevent most common failures. Assign one trained staff member to complete this list and escalate issues to your service provider:
- Inspect and tighten hydraulic fittings and connections
- Clean photoelectric sensors and limit switches
- Check oil level and condition for contamination or discoloration
- Inspect ram guide wear pads and seals for abnormal wear
- Lubricate fittings per manufacturer instructions
- Verify pressure-relief valve settings and test emergency stops
Keep a maintenance log with dates, findings, and actions taken—this is invaluable for warranty claims and planning professional visits.
Seasonal tips: before winter, verify heating elements for hydraulic systems; before summer, check cooling components and consider shade or sunshades for outdoor units to protect control systems.
When to Call for Professional Service
Some issues need a pro. Contact your service partner immediately if you notice:
- Hydraulic pressure loss or visible leaks that don’t stop after a simple check
- Erratic cycling, stalling, or unusual grinding noises
- Repeated electrical faults or breakers tripping during operation
Many manufacturers recommend professional inspections every 90 days for hydraulic, structural, and control-system diagnostics. Establish a service contract before emergencies—our ebook includes a maintenance checklist spreadsheet and recommended service intervals you can download to schedule preventive visits.
Smart Compactor Technology: The Future of Retail Waste Management
Waste compaction is getting smarter: modern systems turn compactors into data platforms that cut costs and improve operational visibility across stores. Smart units give you the signals to schedule service only when needed, spot problems early, and measure waste volume trends for better decisions.
Remote Monitoring Capabilities
IoT-equipped compactors report fill levels, cycle counts, and basic diagnostics via cellular or Wi?Fi to a web portal or app. Typical smart data points include current fill percentage, last cycle timestamp, and fault alerts — enough to reduce unnecessary pickups and avoid emergency service calls. Early adopters report fewer routine collections and better route optimization when remote monitoring is in place.
Integration with Store Management Systems
Top retailers feed compactor metrics into store or corporate systems to correlate waste volume with sales, promotions, or seasonality. That integration supports fleet and distribution efficiency, automated maintenance scheduling, and consolidated sustainability reporting. Want supplier comparisons and a checklist for smart-system features? See the ebook for a detailed vendor matrix and implementation tips.
Take Action: Implementing a Waste Compactor Strategy Today
Ready to turn waste into savings? Start with a short waste audit to quantify volumes, materials, and current collection costs. Use those numbers to evaluate options and pick the right compactor that fits your stores’ needs and long?term management goals.
This concise retail waste compactor guide also serves as a practical commercial waste compactor guide for multi?site businesses—showing you how to size equipment, compare lease vs. buy, and estimate payback.
Get the full toolkit: Buy the ebook “Retail Waste Compactors: Ultimate Guide”
Buy the ebook: Retail Waste Compactors: Ultimate Guide • Get a free two-page checklist
Check Current Price of the Retail Waste Compactors: Ultimate GuideFrequently Asked Questions
Below are short, practical answers to the questions retailers ask most about compactors and site planning.
How much space do I need for a retail waste compactor?
Space needs vary by type: vertical balers have the smallest footprints (roughly a 4′ x 5′ footprint plus headroom), stationary compactors with containers typically need about 8′ x 25′ including container access, and self-contained units commonly occupy ~8′ x 20′. Always add ~3′ clearance around equipment for maintenance and plan for truck approach and container removal height.
Can waste compactors handle all types of retail waste?
Compactors work well for most retail waste streams: cardboard, packaging, and general dry waste are ideal for standard compactors and balers. Food and wet waste should be handled by self-contained compactors designed to control leaks and odors. Never put hazardous materials (batteries, compressed gas, flammables) or very rigid items (pallets, metal fixtures) into standard compactors.
What's the typical payback period for a retail waste compactor?
Payback commonly falls between 12–24 months depending on waste volume, local disposal costs, and labor savings. High-volume sites or locations with high hauling rates often see faster returns. Use the ROI calculator in the ebook to model your store’s expected months-to-payback.
Do I need special permits to install a waste compactor at my store?
Permit requirements vary by jurisdiction but typically include building permits for electrical and concrete work, zoning approval for outdoor placement, and health department signoff for food-related systems. Start permitting early and consult local authorities; many vendors assist with paperwork as part of installation packages.
How often does a compactor need to be emptied?
Emptying frequency depends on your waste volume and compactor capacity. Many retailers reduce pickup frequency dramatically (for some, from several times per week to 1–2 times per month) once a compactor is properly sized. Smart units with remote monitoring can trigger collections only when needed to avoid unnecessary service calls.
Want downloadable templates and a printable waste-audit checklist to answer these questions for your store? Buy the ebook “Retail Waste Compactors: Ultimate Guide & Tips” for detailed FAQs, permit checklists, and capacity tables to help you choose the right compactor for your business.